Final Major Project – CFX – Muscle Simulation (Ziva Dynamics)
For the Final Major Project I will be working with developing my knowledge and skills in muscle and cloth simulation, while simultaneously aiming at producing an outcome worth displaying in a portfolio.
Despite the fact that I am planning to do the outcome in Ziva Dynamics, I will also be researching and trying out the new Houdini muscle system (19.5) and I will be including the research and tests here.
This page will show my main process, with the research and test pieces available through the buttons below.
There is much more to CFX than muscle simulation, but this project concentrates on this particular element of the department (with possible addition cloth simulation, groom and hair/fur simulation).
I will be working on creating a creature from scratch and taking it through the process all the way up to CFX and simulation to create a portfolio piece. I will not model the skeleton, instead I will piece it from existing models to save time, the muscles and skin will be done from scratch and the animation either transferred from existing or attempted from scratch, and to finish it up, depending on time, I will texture and light the creature, possibly within an environment.
References
Each double picture in the section below is a link to a Pinterest board, where you will be redirected after clicking on the picture.
Cute dragons Pinterest board
All collected references
Main references board
Cat references
Possible anatomy inspiration
Types of Dragons inspiration
Concept
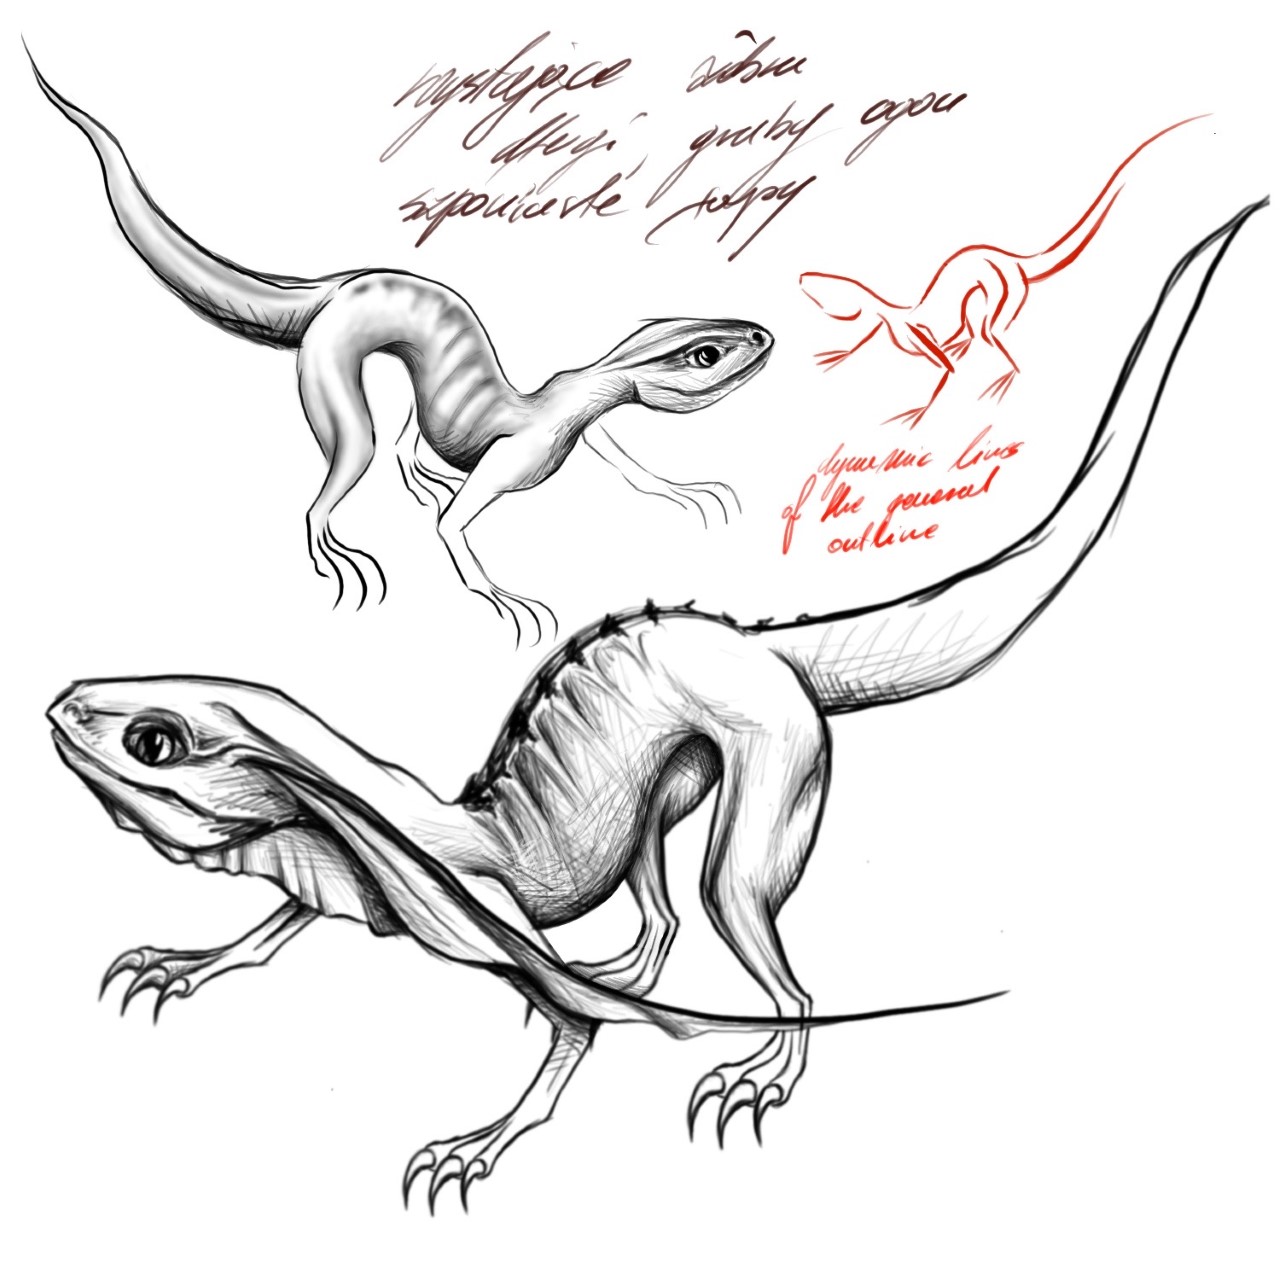
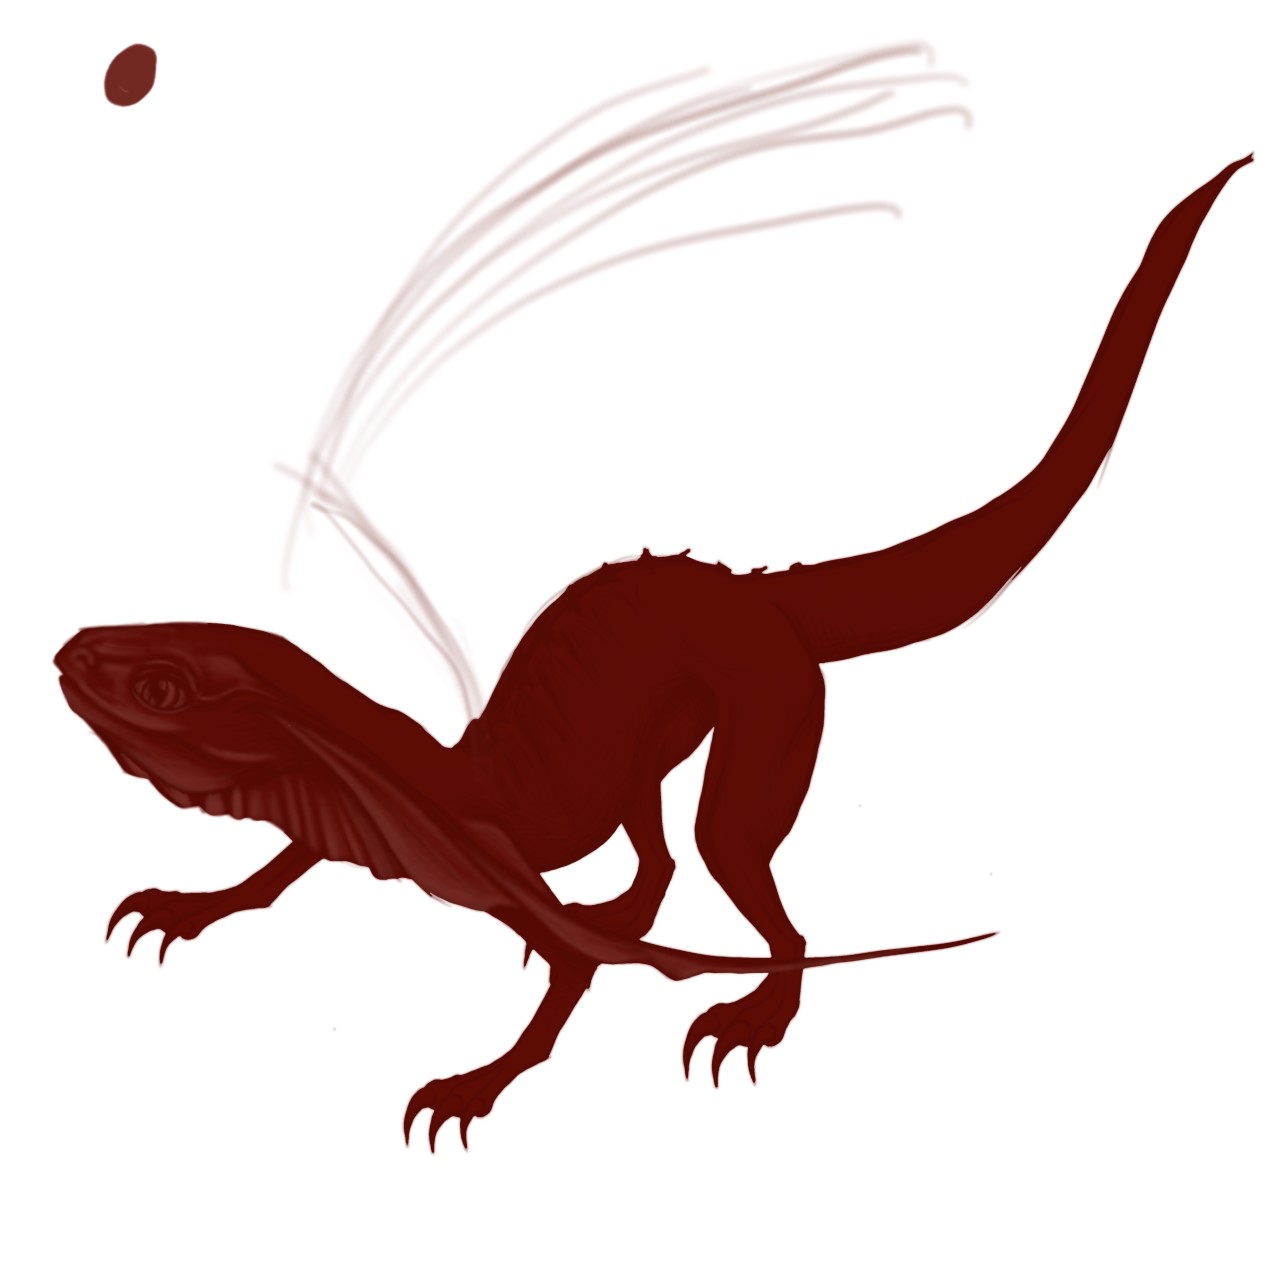
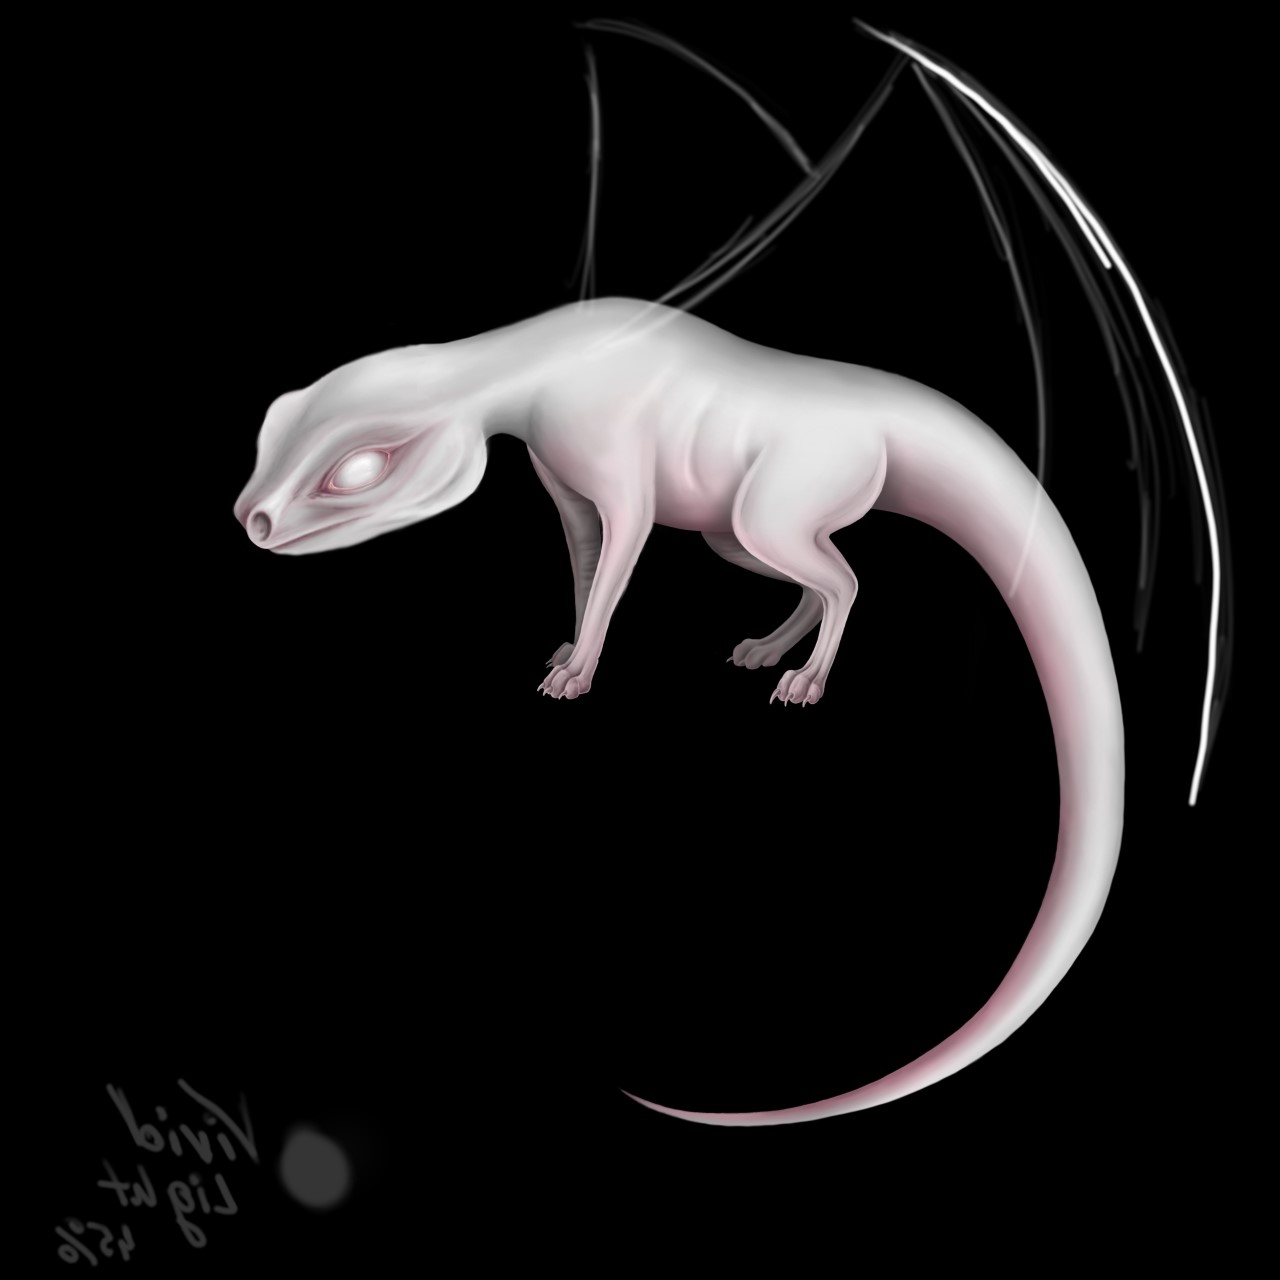
Some sketches and concept art of the design of the creature for this project. I have never really finished any of them, because I dont usually plan, I prefer having a general idea and then going with the flow trying to achieve it, but not being limited to previously sketched design. I think better in 3D, so when it comes to trying on different shapes and types of elements, I do that in the modelling/sculpting stage much faster than if I was to sketch it out.
The one on the far right was the general idea I decided to go with, especially in the colour scheme.
Modelling
Below the process of creating the models for the simulation.
Skeleton
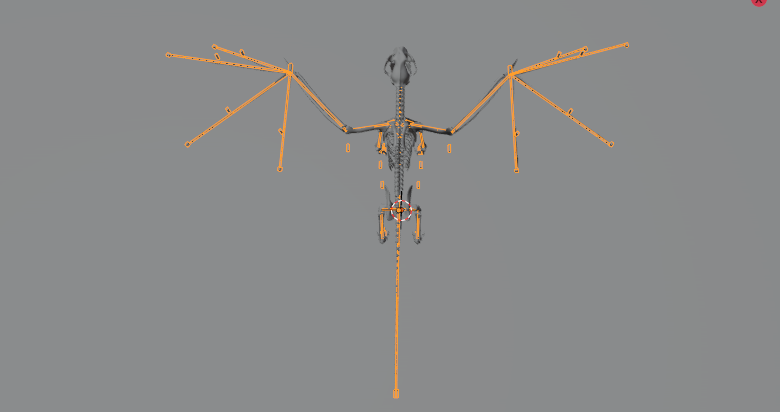
I created the skeleton for the creature by assembling and adjusting existing models from online marketplaces.
The models used to created the creatures skeleton;
“Gryphon Skeleton” (https://skfb.ly/6RXBx) by Got_Pizza is licensed under Creative Commons Attribution (http://creativecommons.org/licenses/by/4.0/).
“Lowpoly Animal Skulls – 1” (https://skfb.ly/6yVxo) by Loïc Norgeot is licensed under Creative Commons Attribution (http://creativecommons.org/licenses/by/4.0/).
“Utahraptor Skeleton” (https://skfb.ly/6tToK) by MithosKuu is licensed under Creative Commons Attribution (http://creativecommons.org/licenses/by/4.0/).
“Feline Skeleton Dec” (https://skfb.ly/IRQM) by westerly is licensed under Creative Commons Attribution (http://creativecommons.org/licenses/by/4.0/).
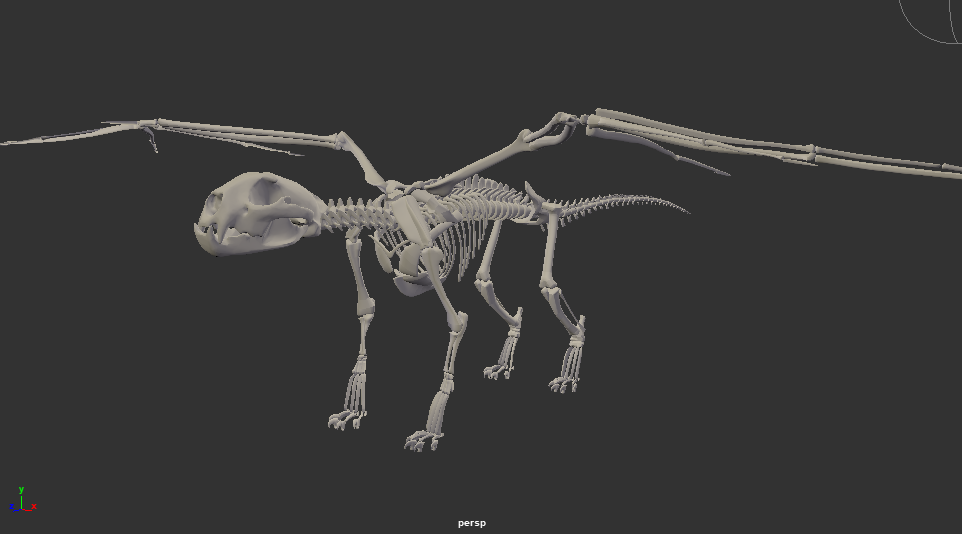
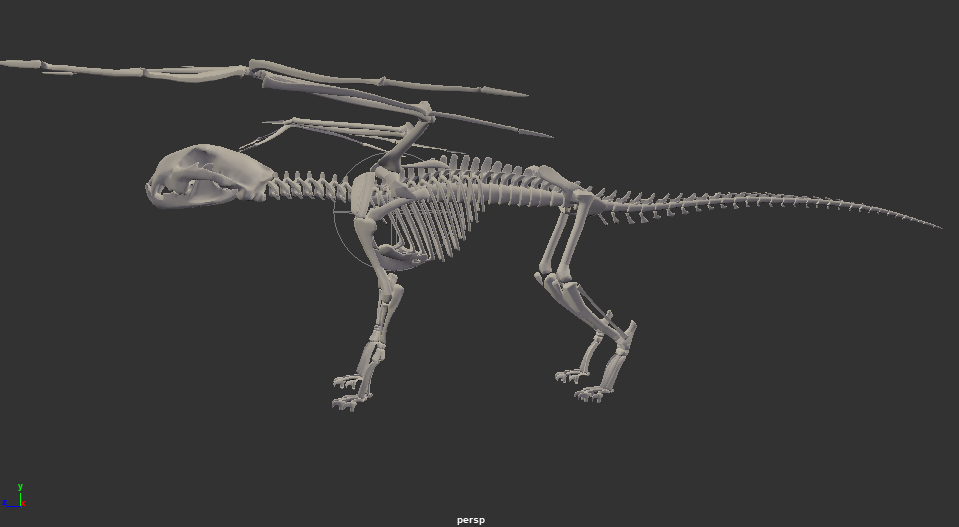
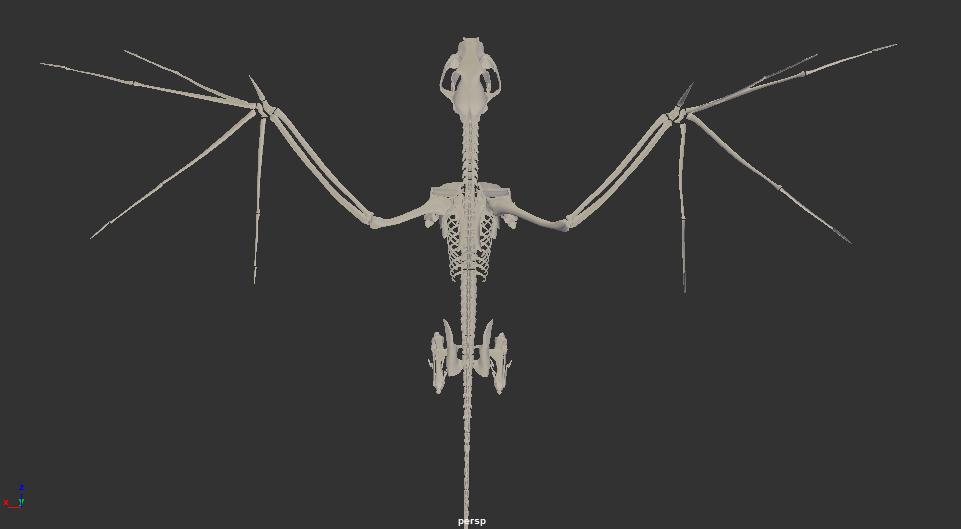
I was aiming at creating something that resembled a dragon, with abnormally large head (something like a bubblehead), but in the end it wasn’t as large as i anticipated. The general body was meant as a cat, with exaggerated t-rex like tail and the addition of wings. The addition of wings also changed the chest area of the skeleton as a couple of additional bones were needed there, to allow some space for attaching the wings (wishbone and some change to the finish of the ribcage), and additional bones were added to the cat skeleton to add the wing base on top and sides of the ribcage and spine.
Muscles
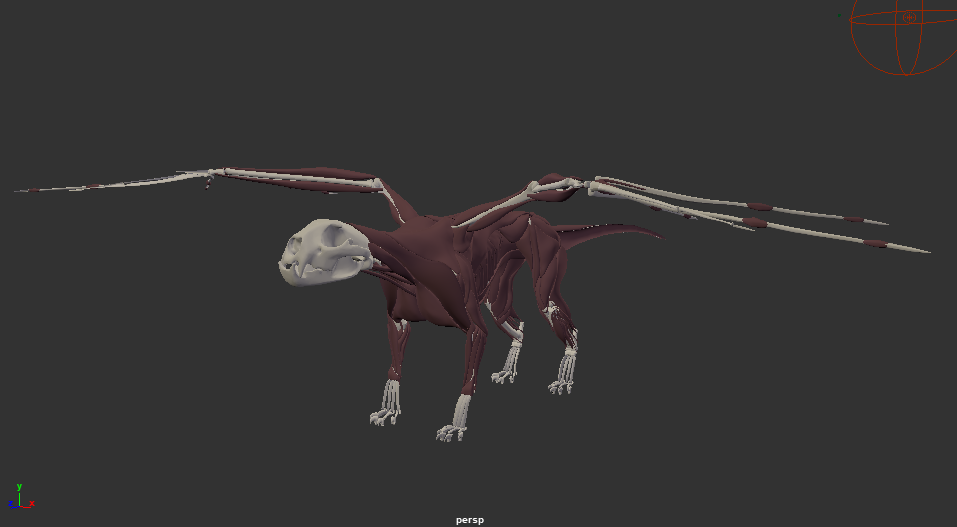
Muscles were created by adjusting Ziva’s Zeke the lion muscle models, and adding my own, modelled and sculpted from scratch to fill the additional areas the lion model didnt have, like the wings.
The general idea was a feline structure, but i did want to exaggerate it, the chest was meant to be larger and the belly area as thin as I could make it while still allowing some internal elements to fit (in theory). The muscles were sculpted and bulged to describe a nice shape of the general shape of the body of the creature.
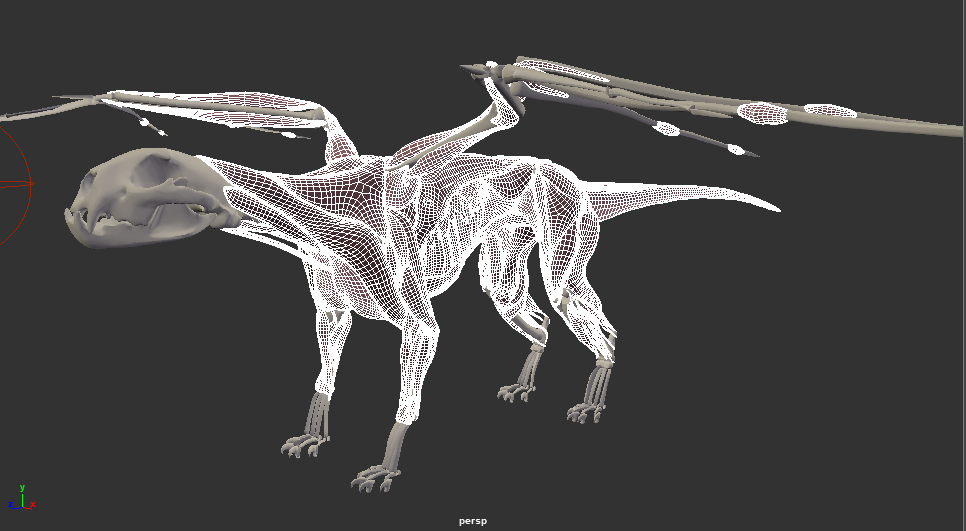
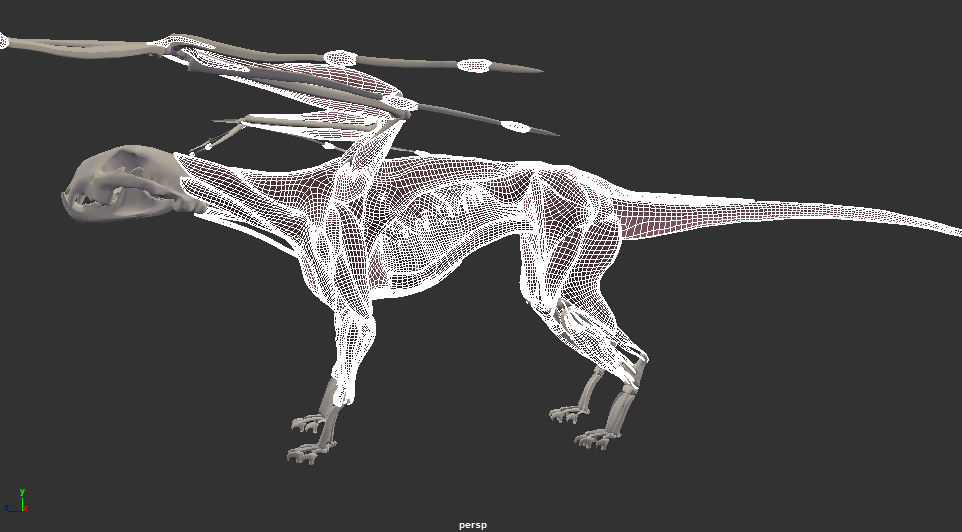
Below all the muscles from different angles.
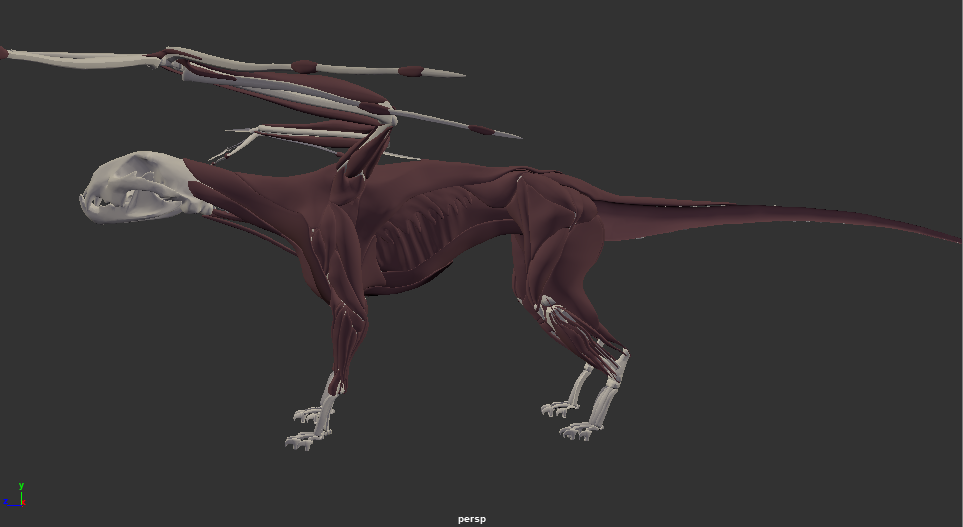
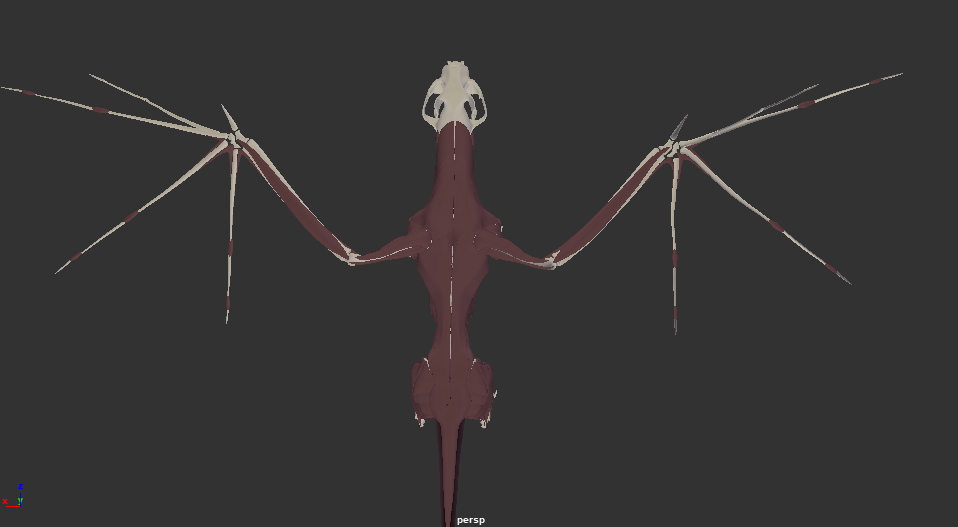
Followed by a breakdown of the muscles I only adjusted (darker) and the ones made from scratch (lighter), displayed in different colours.
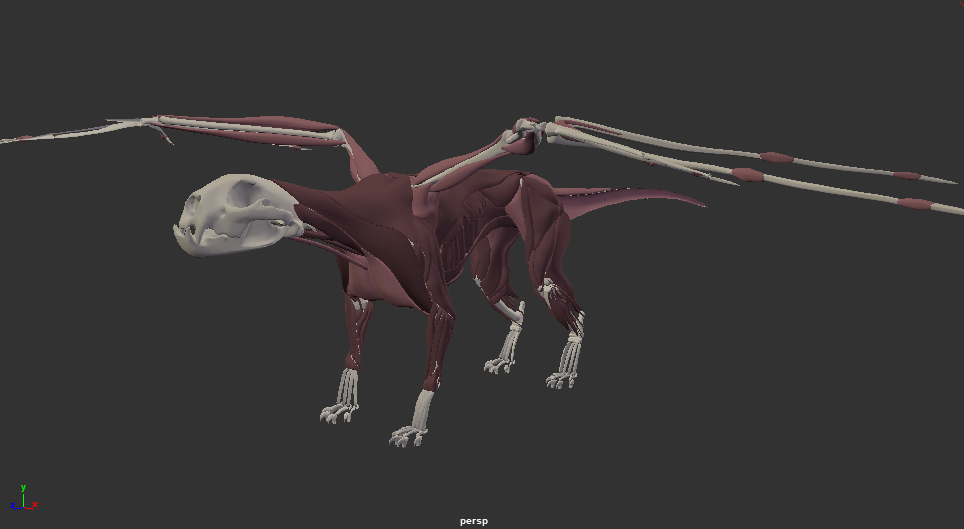
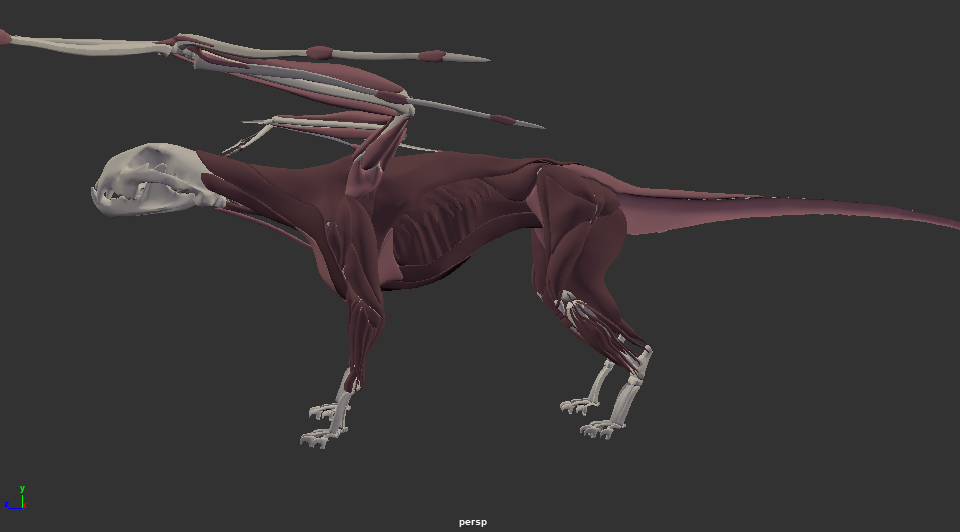

And the topology of the muscles.
After a few attempts at simulating this, I realised that the little joint balls on the wing fingers were not worth the issues they were causing and I knew I can imitate this with the skin layer later on, – they ended up not making into the final, as well as the muscle behind the front leg, linking the armpit with the body.

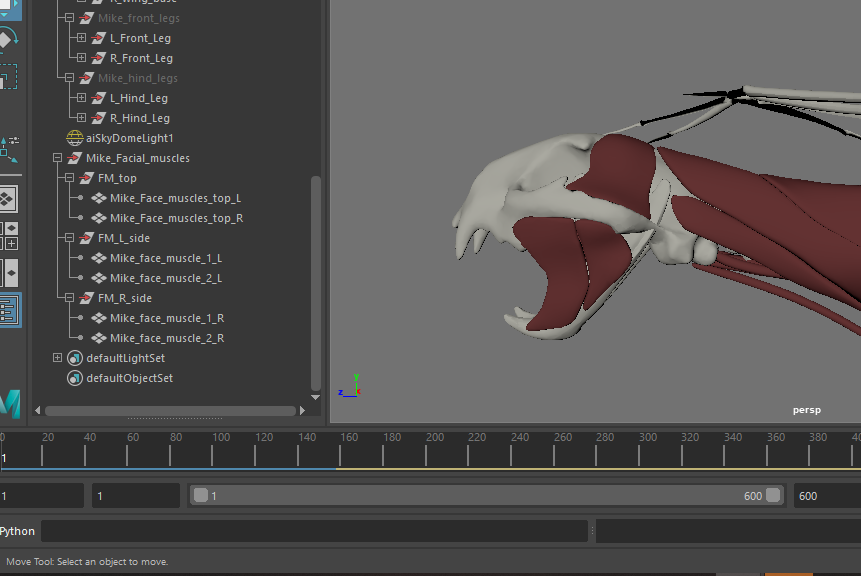
After a while I realised that to get the right structure of the face, especially the stretching on the sides of an opened mouth, I would need to simulate at least a couple muscles in those areas, so I decided to add some facial muscles. At this point I was also thinking of adding some muscles to start building up the structure of the eye brow area and the snout, but now that I think about it, without eyes in place that would most probably not work, and I dont need the simulation on the face, I can compensate with some sculpting at the finaling stage, so I scrapped that idea and decided to go only with the side mouth muscles that will create the sides of the face when at the fascia stage. It is possible that i wouldn’t need that at all and that it would have been possible to achieve only through the use of fascia and skin sim, but I will leave proper experimentation with this for future projects, as I wanted to make sure that this project works with minimum issues (as In was starting to run out of time).
On the left a quick sketch (on top of a screenshot) to figure out what I need and where to attach it, and on the right, the 3D muscles.

Fat and Skin models
The fascia, fat and skin layers were made with the use of Ziva’s Isosurface triangle mesh, which is a tool that makes a copy of the selected mesh a particular distance of the original mesh and with particular density and triangle size (all can be adjusted).
Following the muscles we have a fascia layer and a fat layer, it is possible to simulate them together or separately, which, I was told is a personal preference. Simulating them together takes away some control, but it shortens the time and processing power required, and since I was down on both, I simulate the fat and fascia in one go.
To make the model, I had to make fascia (isosurface, with the ends deleted, it ends at wrists/ankles etc) as close as possible, make it a cloth object, set it to sort of shrinking so it can hug the muscles as closely as possible and simulate this for a few frames of a preroll, until it stops shrinking. Then I deleted the history of the mesh (as I need only a static one) isosurface it again and connect the borders, as the fat layer is a tissue so it needs to be a watertight mesh (as opposed to fascia which is a cloth and only needs a surface not a mesh), alternatively highlighting and extruding all does the job too.
Rig & Animation
Originally I was planning to try to animate it, but I was worried about the time it would take me, then I tried to find something I could transfer to the model but wasn’t very successful, so I came back to animating from scratch. Took way longer than I should have spend on it and the outcome is not great, but thats not the focus of my project so it will have to do for now.
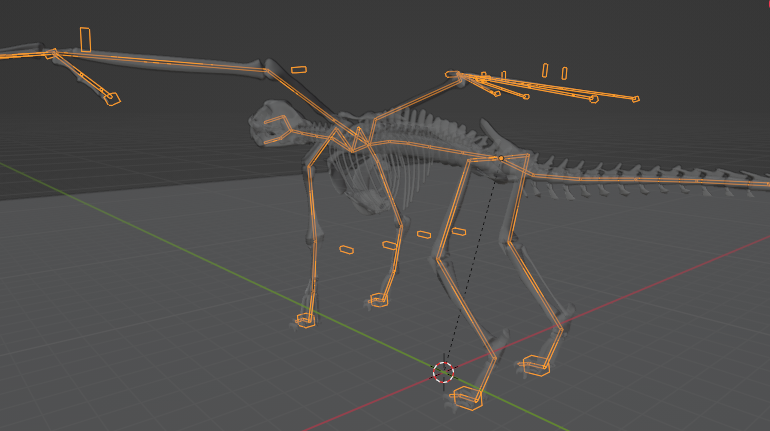
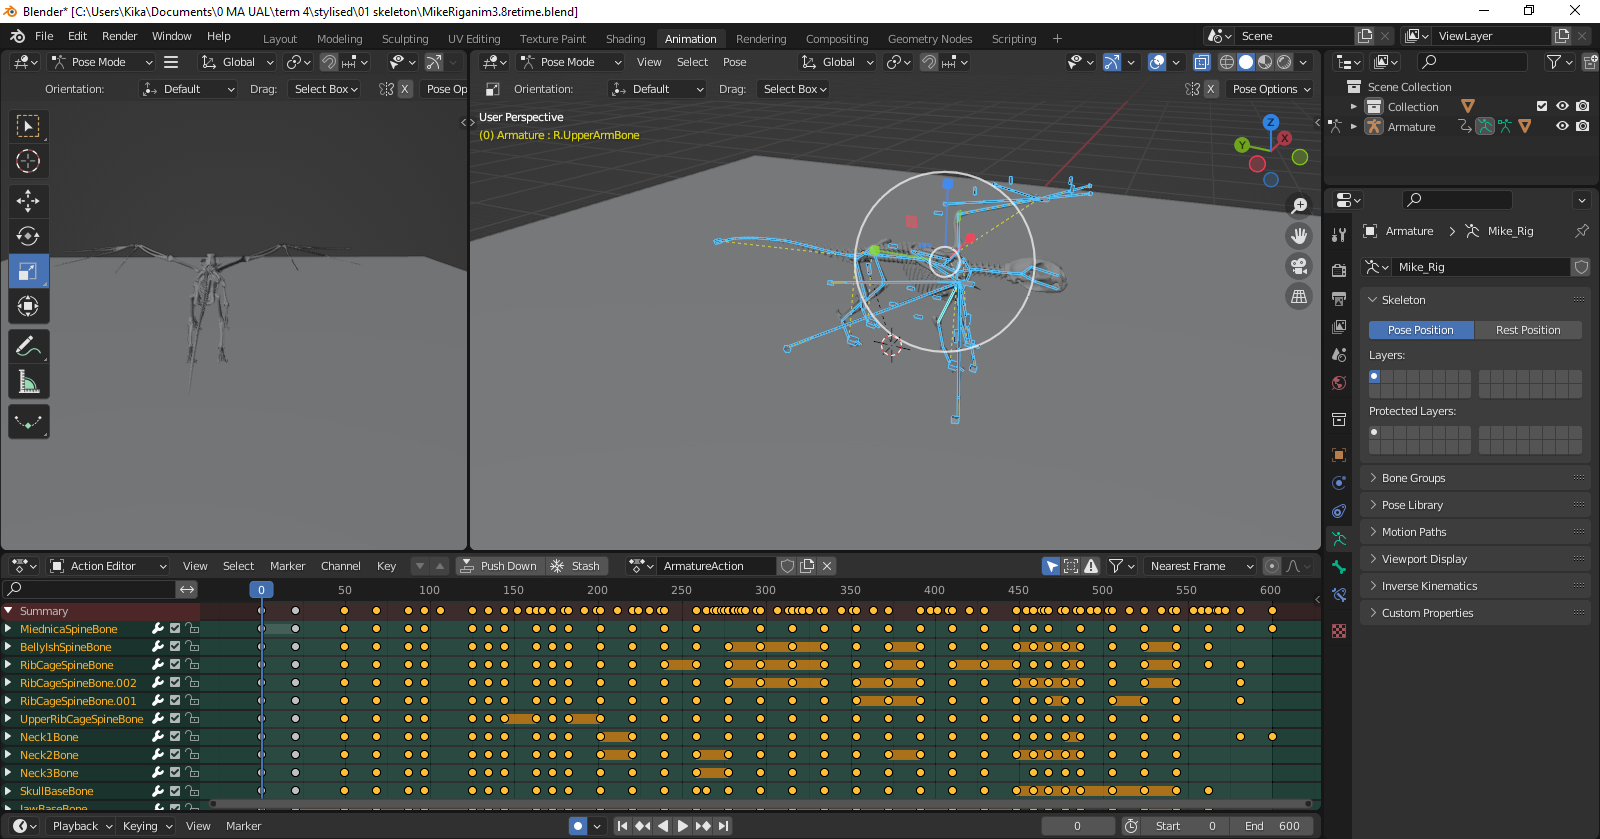
Rigged and animated in Blender (I cant get used to animating in Maya). Below, some screenshots showing the rig, followed by the view of the whole workspace with the technical aspects of the animation (timeline, keyframes) both in a still and as a video, showing a rough breakdown of the keyframe poses.

Final (ish) animation of the tiny dragon creature. After I took a break from it and asked a few people for a review I realised some issues with it and it needed small adjustements in the head and tail, but it is roughly the final animation I will be working with for this project.
Furthermore when I did a quick check of the muscle structure, I realised that in some cases the wing passed through and/or too close to the tail, pulling the muscles behind it, so this also needed to be adjusted. But again, the general animation stayed the same.
As someone with not much experience with rigging and animating, I had no idea what to pay attention to. Also I believe that animating the skeleton (instead of a full body character/creature) is much more difficult, because you cannot simple see the limitations of the pose. I, now understand that me, not knowing much about simulation and knowing nothing about animation for simulation caused all the problems I had encountered and had to later try to cover or hide. With zero understanding of the way this works in practice, I just animated movement that I though was acceptable, not knowing that putting bones this close to each other wont allow for simulating additional bulk of a muscle (or a few layers of muscles…) on top of that. It is logical when put this way, but I simply wasn’t thinking about it, as it was the first time I was doing this. This resulted in a disaster that I had no time to fix (animating almost from scratch)… half of the bones were pressing on muscles and pushing them out of the way, breaking attachments and causing loads of interpenetrations and – as I found later – other collision issues (practically ignoring collisions in places, I still dont know for sure what happened there…).
Simulation
Muscle
Muscle structure check (Houdini)
I have started with making a quick Houdini set up (as it is more automated and takes a fraction of the time required for setting up a Ziva rig) to check if the muscle structure will work, here I have noticed that the wing intersected with the tail, which I fixed (or thought I did, as it is still happening on the videos below, but it is much smaller of an issue now), and I wanted to make sure that the wing arm muscles will work with the spine muscles near them.
Doing this in Houdini saved me some time, as in Ziva I would most probably have to redo the whole set up, and in Houdini it takes around 10min to set up the default simulation (when it is working), Im am still going with Ziva for the final as I feel like it gives me much more control than Houdini, and I havent learned Houdini fully yet, so I dont want to risk having to deal with loads of troubleshooting again.
After I make sure everything is working fine, I will move on to the actual Ziva muscle rig work.
The first one i didnt upload as the tail was pretty bad, I took 5 min to fix that and tried again, hopping it would work, but at least this shows the attempts and trial and error.
Above the second try, with the wing and hind leg still catching the tail and on the right third try with everything I could spot (possibly will have to adjust it again somewhere, but I went pretty much frame by frame and I was happy with the result so far). The wing muscles are not right, but this is a temporary check not a final outcome, in Ziva, with more control, ‘Im sure I can get them looking right.
Another thing is that after seeing it simulated, I’m questioning a couple of the muscles I added, so I will have to have a closer look and decide whether I want to keep them or get rid of them.
Main work (Ziva)
Below, the rough stages in which I ended up simulating the muscles. As I mentioned before, I knew I probably couldn’t manage to simulate all at the same time, so I divided the whole muscle structure into layers, originally, (after the tests I’ve done before) I thought I will only use the layers to divide the work, making sure I simulate the bottom layers first, so then the top layers follow the movement of the bottom ones. But after a while I have realised that as long as the muscles are not attached or affecting one another, like the legs for example, I could cache the simulation on those, and this way decrease the time and processing needed for the task, because it wouldn’t need to calculate all the layers together.
The process videos below show different stages of the simulation from the solver point of view, showing everything that is happening in the simulation. Parts that are cached, do not show in the solver, unless it needed an attachment or two and I needed to make the cached geo a bone object to allow attachment (done only in cases of really minor attachments, no more than couple, otherwise I tried to sim and cache together).
In the simulation (solver) bones are shown in white, tissue, in dark pink, sliding attachment’s are purple, fixed attachment’s – red, collisions in green and fibres excitation in orange/yellow (depending on the strength). The black outline of triangles around all of the muscles are tet (tetrahedra) mesh, it defines the simulation quality and the mesh’s behaviour, it dictates the tissue reaction and flexibility (as the simulation is not so much based on the poly resolution of the mesh, but on the tet size and density).
The last video of the six is the final muscle simulation, showing the cached, simulated meshes of the muscle.
Fascia & Fat
A playblast of the solver showing the fascia and fat layers solved together. Bones coloured in red to ensure spotting penetrations through the top layer will be easy. The dark purple colour shows the sliding attachment of the fascia to the cached muscle structures, originally I had the whole inside painted with attachement but as I saw issues with it I started experimenting and eventually decided that some areas work better not attached, I havent seen that on any of the tutorials Ive watched so I am not sure if that is fully correct, but as long as the material of the fat wasn’t soft enough to stretch and the attachment was firm enough to hold it in place, I think it is a plausible way of fixing some issues (that come all the way from the skeleton being animated incorrectly).
Skin
I treated the skin simulation in the same way I did fat, trying painting the attachment off the areas that were visibly incorrect, and it did end up easing the issues, although by no means this is a fully functional simulation, nor a good enough for the industry one, but now I know what to avoid in the future attempts, and how to fix some troubleshooting, so I will take it as a relative success.
Red is a fixed attachment and blue areas of no attachment. To achieve the wrinkling of the skin the strength of the attachment is decreased from the default, and I loved seeing this actually working, the wrinkles were a mess due to the previous issues with the lower layers and eventually the material I used didnt show them as much (which is a shame and an area for improvement in the future).
Membrane
The wings were made by placing a plane underneath the wing in an orthographic view, cut to size, adjusted to match the 3d shape of the wing and turned into a cloth object, with attachments in the areas touching the skin part of the model, then simulated.
The correct way of doing this would be to have two versions, a low and high poly version of the model and simulate the low poly proxy geometry, although as I played with the material of the skin, it became apparent that I dont need to do that, and actually the semi-transparent membrane could potentially look weird if it was a mesh with some thickness to it, so I decided to keep just the subdivided proxy geometry.
Breakdown
A montage of playblast taken of the different stages of the simulation to show the progress. All the issues with the lower layers visible, loads of collision issues, glitching, squiring, and pushing, but eventually the skin layer (with the rest deleted because it was poking through….) looks acceptable enough for a first try.
Environment
– Real Life video and the video prep for comp
Original video used for the shot.
The video after track, trackers removal and denoise.
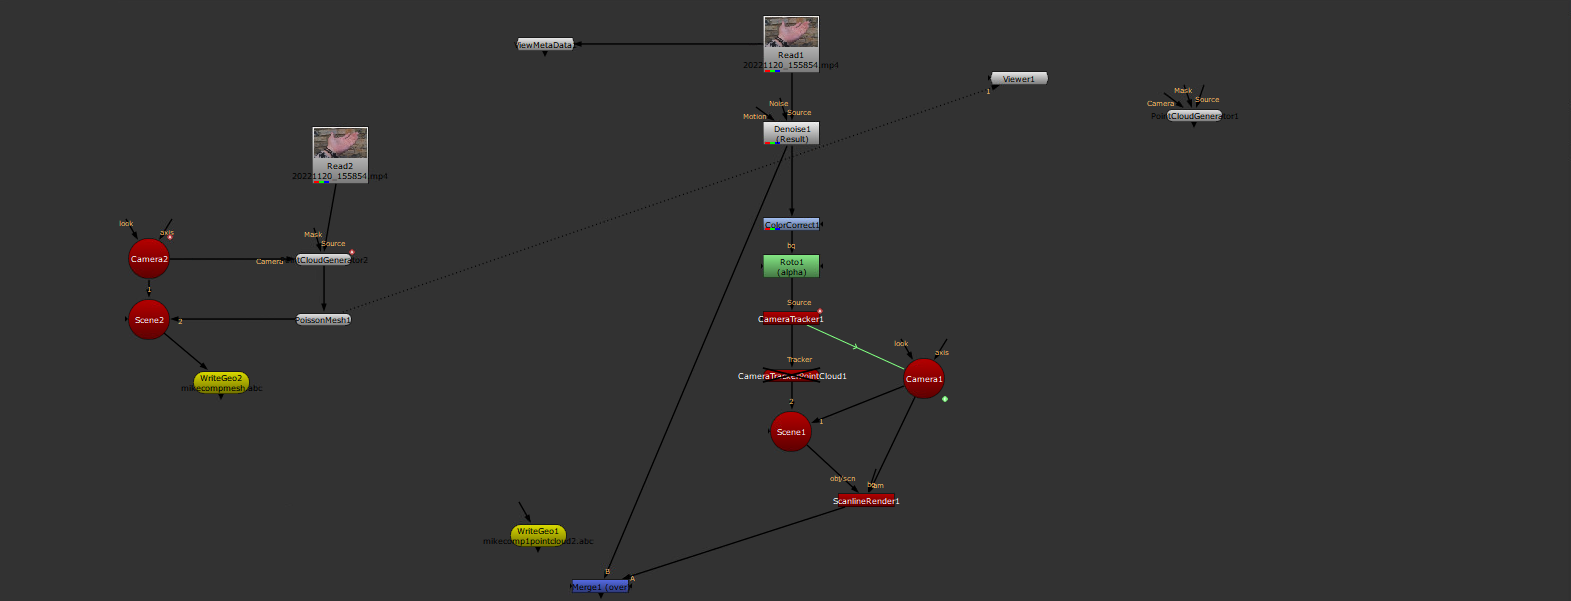
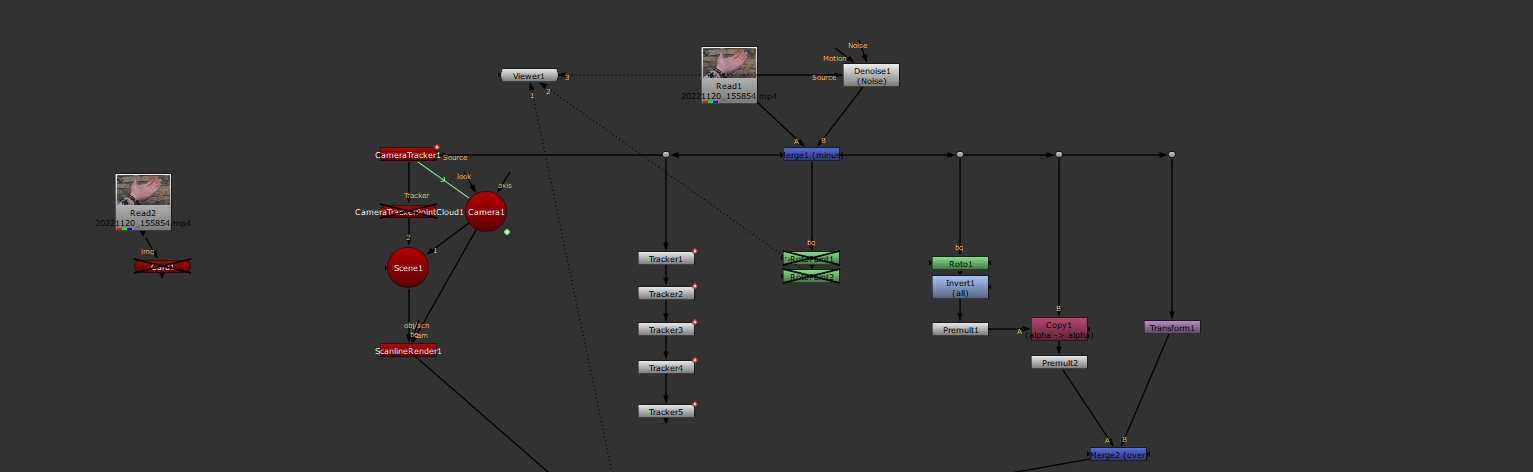
The Nuke script of experimenting and trying if it wouldn’t be easier to import the cached creature into Nuke 3d space and attach it to footage through tracking information. I eventually left that idea as I had issues with it. It was great to see a quick version of what it would look like finished as it did work, just not good enough. It also helped me figure out the placement.
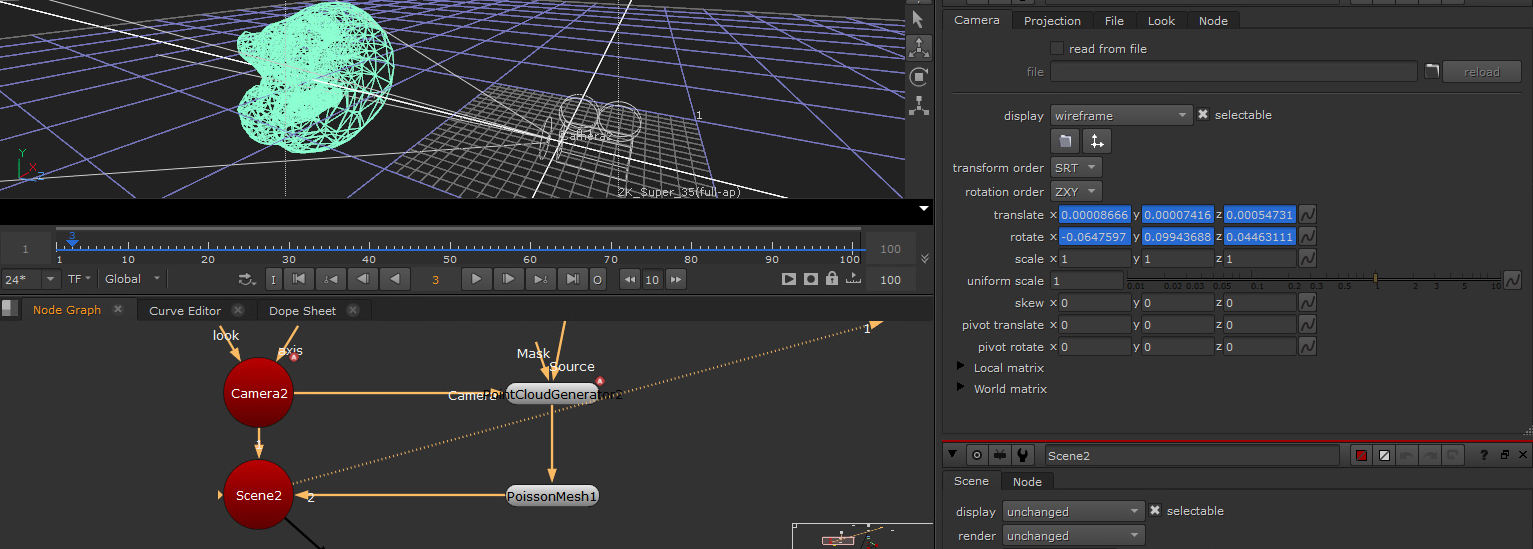
A screenshot of creating the mesh from the point cloud of the footage, that I later used to align the creature in the camera for render. I checked that multiple times, and i did parts of the render on low setting to check if the track works and if it will be stable, but in the final render something ended up changing, as the shot was nowhere near as stable as the tests were.
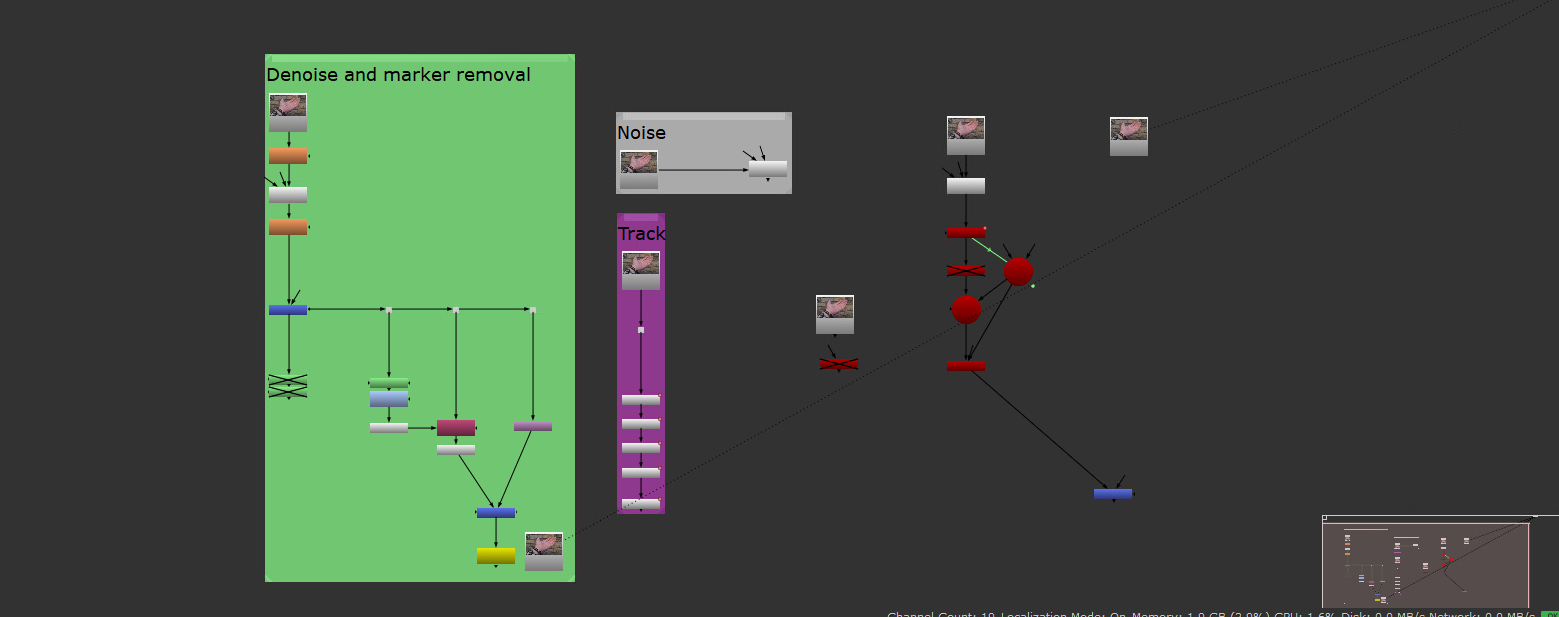
A screenshot of the marker removal I have done on this shot. I have tried a few ways and since I am not a comper some worked some didnt, and I eventually covered mistakes wit Roto paint and it want bad… Until I forgot that I shouldn’t use the original noise of the footage, as it will have a ghost image of the trackers in it… I realised after it was too late to change it for the final submission. But I guess I will learn to keep an eye for that in the future as it messed up the final completaly… and I certainly learned the importance of that.
Render and Comp
A final render of Mike, through the camera of the footage and in the right position on the hand when overlapped with the footage…. or how it should have been… in reality I rendered the body and membrane separately because of a mistake. The render took a while and I didnt supervise it, I only set it up a few times (i rendered in parts to make sure I dont loose too much time and I know where I finished in case of a crash or something), and at the end I noticed that majority of frames didnt have the wings in it. I rendered the wings separately and put them back together in comp.
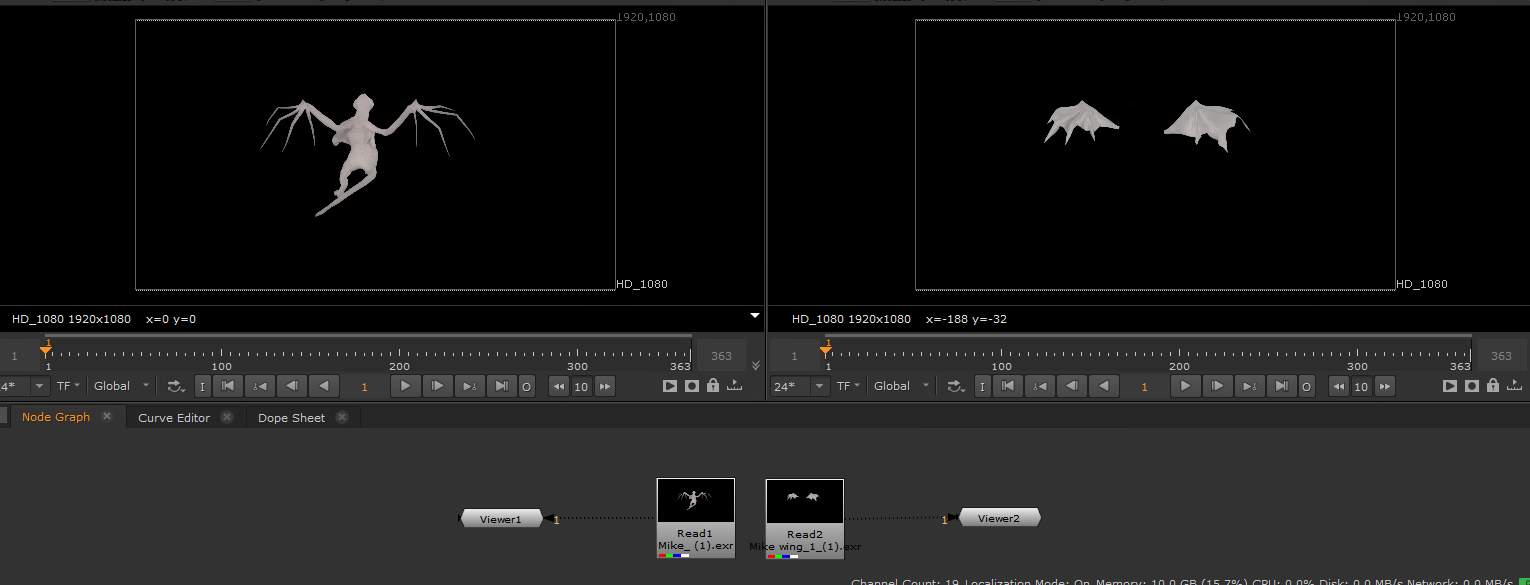
The two elements in Nuke. This mistake in rendering was actually a happy accident as I wanted the wings to be semi-transparent but I had issues with the material in Maya and it simply wasn’t working. this way I only decreased the mix in the merge node and I got exactly what I wanted. Normally I wouldn’t give up on trying to do that in Maya, but I was very close to a deadline and I just decided to go with whatever I had.

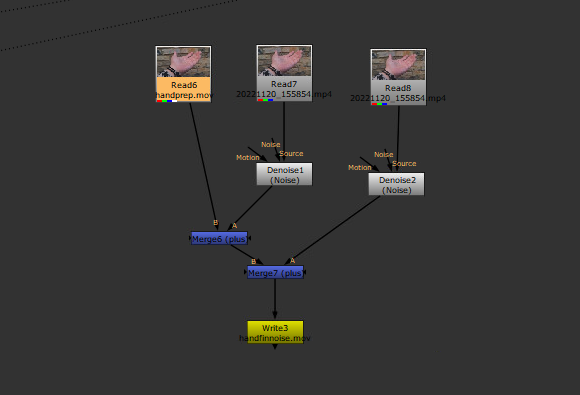
The process of putting everything together on the left and adding the noise back to the footage, I didnt add the noise to the final comp as no matter how much I tried to decrease the noise on the 3d part, there was still some left, and it matched relatively ok with the noise on the footage, so I kept it that way.
Ive also duplicated the left part of the script, transformed and graded it to create a shadow, which is far from perfect but I was out of time.
The final outcome
The track is sadly all over the place, even though it is the best version I managed, as mentioned i checked the track and placement of 3D before final render and it was working perfectly, I still have no idea what happened there. And the ghost of the tracking markers because of the noise use is another huge mistake for the compositing part (I covered the 3D part before), this at least I know how to fix and avoid.